In this chapter we will deal with action points. First, however, I should explain that action points are the points in the area where a character moves after spawning. At an action point it starts performing the various activities you’ve assigned it. Actions involve a set of various animations which will occur for a particular character at a particular place and time.
Let’s create action points for our NPC, Siegfried. As you may remember, while creating a spawn set for Siegfried we assigned five actions to him. However, we do not need to add five action points. In fact, we’re only going to assign three. To add action points, click on the axe icon on the Area Editor toolbar (the ninth icon from the left):

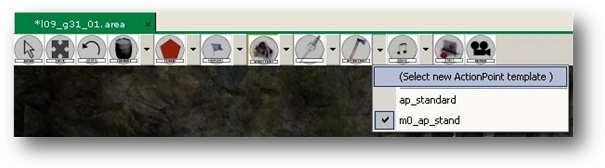
As with spawn point, you can also select a template for action points. Click on the downward arrow located next to the action point icon:

Choose Select new ActionPoint template from the menu:
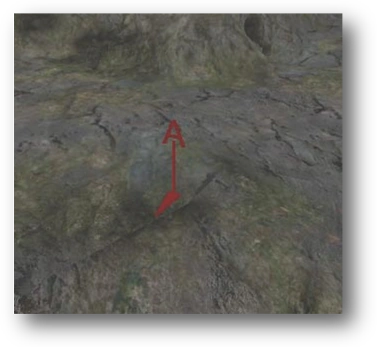
Open the Actionpoints tree by clicking on the small ‘+’ sign and select the required action point by double-clicking on its name. An object representing the action point will “stick” to the cursor. Now left-click the spot where you want to place the action point. Let’s place it next to Siegfried’s spawn point. The spawn point will be added to the area:
Now we have to set the attributes for this action point. To do this, double-click on the action point. The Actionpoint window will appear on the right side of the D'jinni Editor:
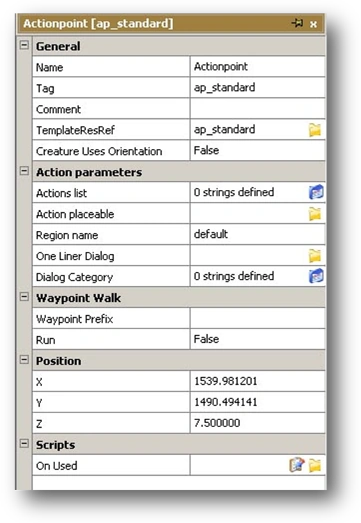
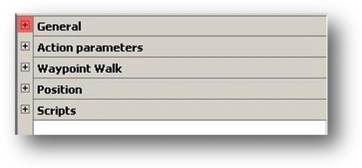
The attributes of the new action point are in the left column. They are divided into sections (General, Action parameters, Waypoint Walk, Position and Scripts). To make navigation easier, you can collapse the sections by clicking on the small ‘-‘ sign next to each section name:
To expand a previously collapsed section, click on the small ‘+’ sign next to the section name:
The values of particular attributes are in the right-hand column. Some of these have the same task as the attributes for spawn points. The attributes are described below:
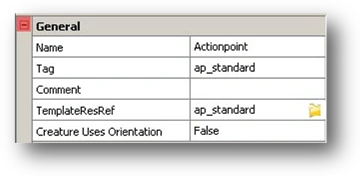
General Section:
- Name. Contains the name of the action point. This is usually the same name, i.e. Actionpoint, for all action points in the area.
- Tag. Contains the action point’s identification tag. This is usually the same tag, i.e. ap_standard, for all action points in the area. Tags are mainly used with scripts.
- Comment. A space in which to write a comment. This is not used by the game, it’s just an information field. You can write whatever you want here.
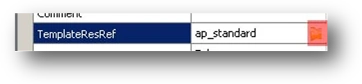
- TemplateResRef. Contains the action point template file. Action points have their own templates too. The standard template for an action point is a ap_standard.uta file. If you want to change to a different spawn point template, click on the small yellow icon located in the right-hand column opposite the TemplateResRef attribute:
- This opens the standard Windows window used for loading files. Select the template you want and click on Open.
- Creature Uses Orientation. Determines whether a character will perform an action while facing in the direction indicated by the action point icon. Note that the action point object has an arrow, just like a spawn point object. Setting this attribute on True directs the character to perform an action while facing in the direction of the arrow. We can set this attribute to True for Siegfried. If you want to change the setting, click the right-hand column opposite the Creature Uses Orientation attribute:
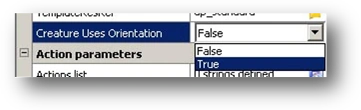
- The values you can assign to this attribute are:
- - False – the character will perform actions while facing in a randomly chosen direction,
- - True – the character will perform actions while facing in the direction of the action point.
ActionParameters Section:
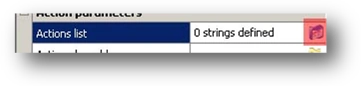
- Action list. Contains a list of actions that a particular character will perform at a particular action point. Remember that in order to perform an action assigned in this attribute, the character must have an identical action assigned in the spawn set. As a reminder, we assigned Siegfried five actions: w_h_pray, w_h_bored1, all_walkto1, all_walkto2 and w_h_alarmed. Now let’s assign an action to this action point. To do this, click on the small blue icon located in the right-hand column opposite the Action list attribute:
- The Action List window will open:
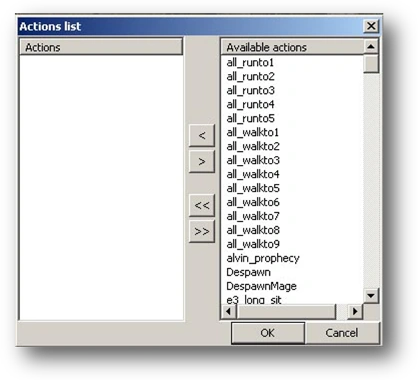
- Actions currently assigned to an action point are found on the Actions panel. The list of all available actions is located on the Available actions panel. To add an action to an action point, select it from the Available actions panel and click ‘<’:

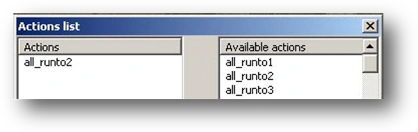
- The action will automatically appear in the Actions panel. This means it has been assigned to the action point:
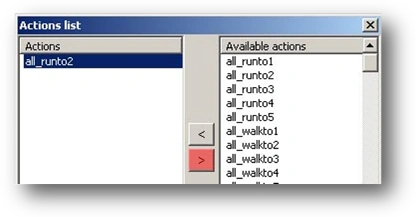
- To remove an action, select it from the Actions panel and click ‘>’:
- You can also select more than one action at a time. Do this as in other Windows applications, by clicking and holding down CONTROL or SHIFT. To assign all of the available actions at once, clicking ‘<<’:
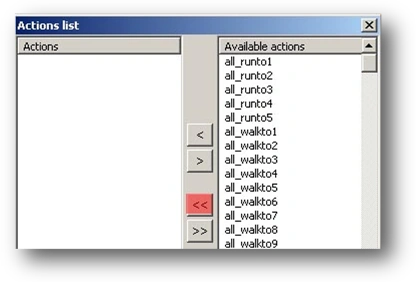
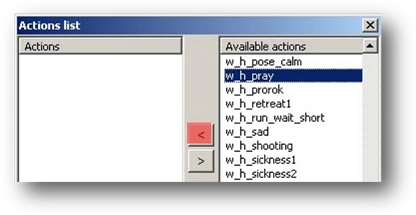
- Clicking on ‘>>’ will remove all the action points. Let’s assign two of Siegfried’s actions to this action point. These will be w_h_pray and all_walkto1. Look for w_h_pray on the Available actions panel, highlight it and click ‘<’:
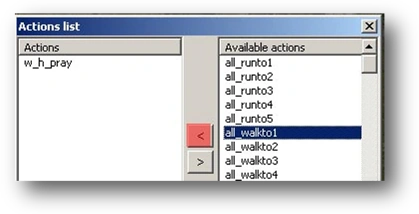
- Do the same with all_walkto1:
- You can also double-click on the name of the action and achieve the same effect as by using ‘<’. Because this list is long, you can make the search easier by selecting the first action from the Available actions panel and then typing ‘W’. The list will then jump to actions starting with the letter ‘W’. Once you’ve assigned the function to the action point click on OK.
- Action placeable.' Responsible for how the action point looks in the game. An action point usually has its own object which is invisible during the game, however a bed, for example, could also serve as an action point. To change the object of an action point, click on the small yellow icon located in the right-hand column opposite the Action placeable attribute:
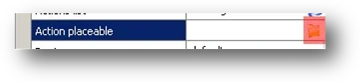
- This opens the standard Windows window used for loading files. Select the object you want to load (files in the .utp format) and click on Open. The standard action point object will automatically change into the new object.
- Region name. One of the most important action point attributes. This is where we assign a tag that tells the NPC what actions it is supposed to perform at the specified action point. Remember the Region List column where we added spawn regions? If we want a particular character to perform an action at a particular action point, both the spawn region and the action point must have the same name. For Siegfried the NPC we assigned the tag action_siegfried. Now we have to assign the same tag to this action point. To assign a tag to an action point, click the right-hand column opposite the Region name attribute and type in:

- Then hit ENTER.
- One LinerDialog.
- Dialog Category.
Waypoint Walk Section:
- Waypoint Prefix.
- Run. Determines whether a character should walk or run when going to a particular action point. For Siegfried we can set this to False and he will walk from one action point to the next. To set this attribute click the right-hand column opposite the Run attribute:
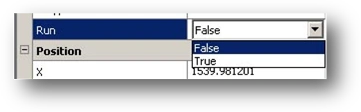
- Select False from the list.
- The values you can assign to this option are:
- - False – the character will walk between action points,
- - True – the character will run between action points.
Position Section:
- XPosition. Contains the position of the action point on the X axis. This attribute is automatically updated whenever you move the object. You can leave the default settings here.
- YPosition. Contains the position of the action point on the Y axis. This attribute is automatically updated whenever you move the object. You can leave the default settings here
- ZPosition. Contains the position of the action point on the Z axis. This attribute is automatically updated whenever you move the object. You can leave the default settings here.
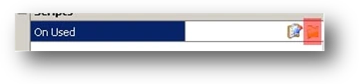
Scripts Section:
- On Used. Contains a script that will be performed when the character performs an action at a particular action point. To assign a script, click on the small yellow icon in the right-hand column of On Used attribute:
- This opens the standard Windows window used for loading files. Look for the required script and click on Open.
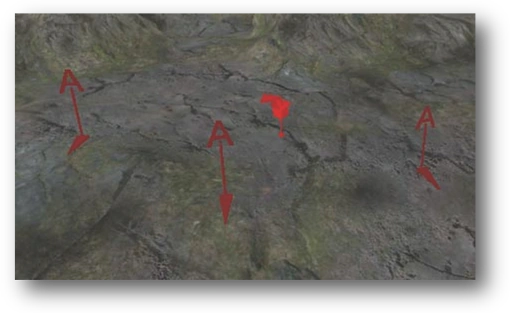
That’s how you create an action point. We still need to create action points for the other characters and Siegfried needs two more as well. Add these action points a short distance away from previous one:
Set the same attributes as the first action point:
- - Creature Uses Orientation – True,
- - Action list – all_walkto1, w_h_bored1,
- - Region name – action_siegfried.
Do the same for the second action point:
- - Creature Uses Orientation – True,
- - Action list – all_walkto2, w_h_alarmed,
- - Region name – action_siegfried.
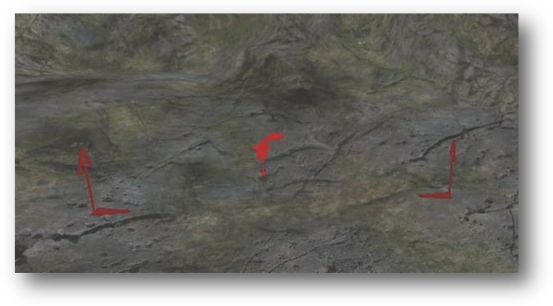
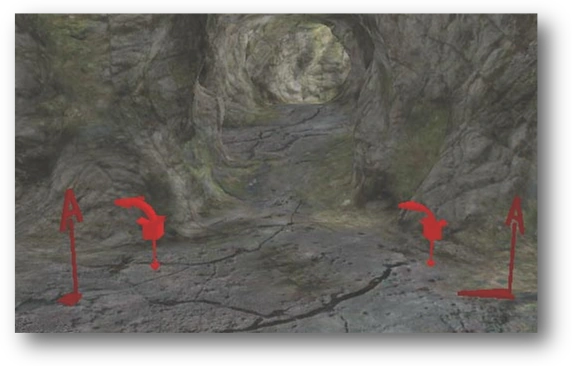
Now let’s make action points for Jethro. Place them a short distance from each other as well as from Jethro’s spawn point:
Set the following attributes for the first action point:
- - Creature Uses Orientation – True,
- - Action list – w_h_tired1,
- - Region name – action_jethro.
Do the same for the second one:
- - Creature Uses Orientation – True,
- - Action list – all_walkto1,
- - Region name – action_jethro.
It is time for the Professor. Let’s add one action point close to the Professor’s spawn point:
Assign him the following attributes:
- - Creature Uses Orientation – True,
- - Action list – w_h_guard,
- - Region name – action_professor.
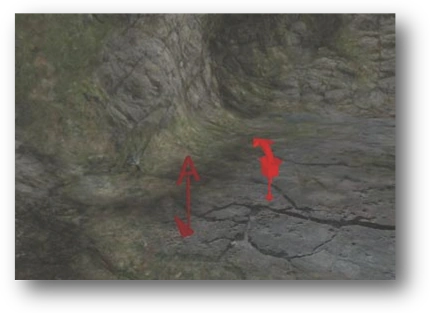
And finally, the Professor’s guards. Place one action point close to each spawn point:
Set the following actions for the first action point:
- - Creature Uses Orientation – True,
- - Action list – w_h_guard2,
- - Region name – action_bandit1,
Do the same for the second one:
- - Creature Uses Orientation – True,
- - Action list – w_h_guard2,
- - Region name – action_bandit2.
We don’t need to add any action points for wolves.